Try it out: https://hack-western-x.vercel.app/
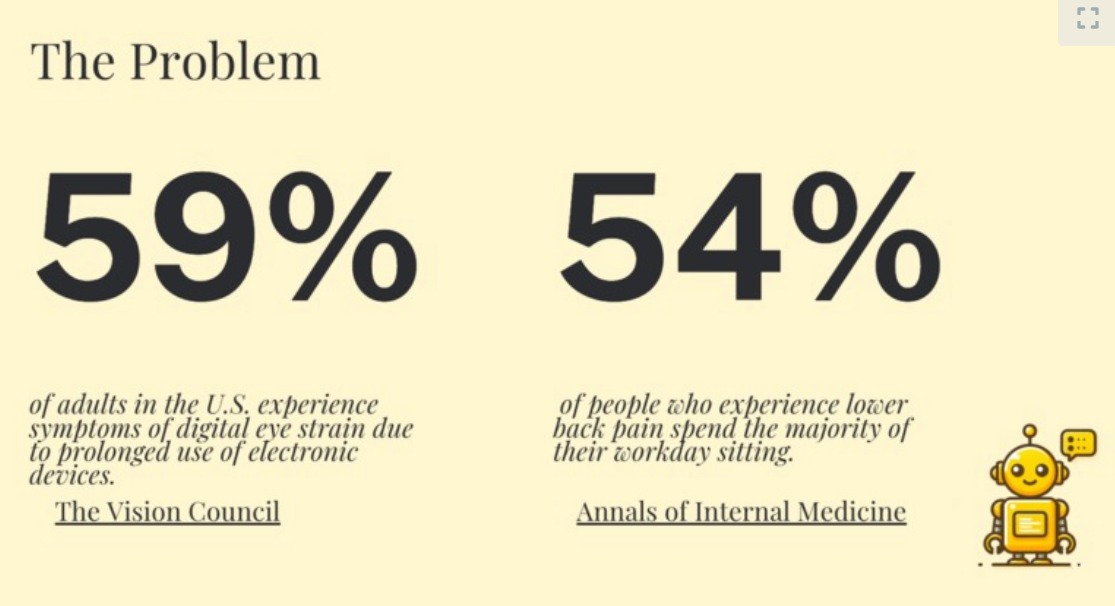
Problem
Solution
What it does 🤔
Health Mate is your comprehensive digital health assistant aimed at improving your well-being while working at your computer. It incorporates tools to track your posture, manage screen time, and promote healthier habits.
Posture Correction and Awareness 🪑
Health Mate uses advanced AI posture detection to alert you when your posture needs adjustment.
It tells you when your set work time is done, and automatically starts it again when you are back in frame after it notifies you with a phone SMS!
Screen Time Management ⏰
Health Mate detects and notifies you when you’ve been sitting or staring at the screen for too long, encouraging periodic breaks. Using innovative face detection methods, it the timer or screen time is only counted when you are looking at the screen and then it prompts you to glance out the window, reducing eye strain and promoting a healthier balance between screen time and rest.
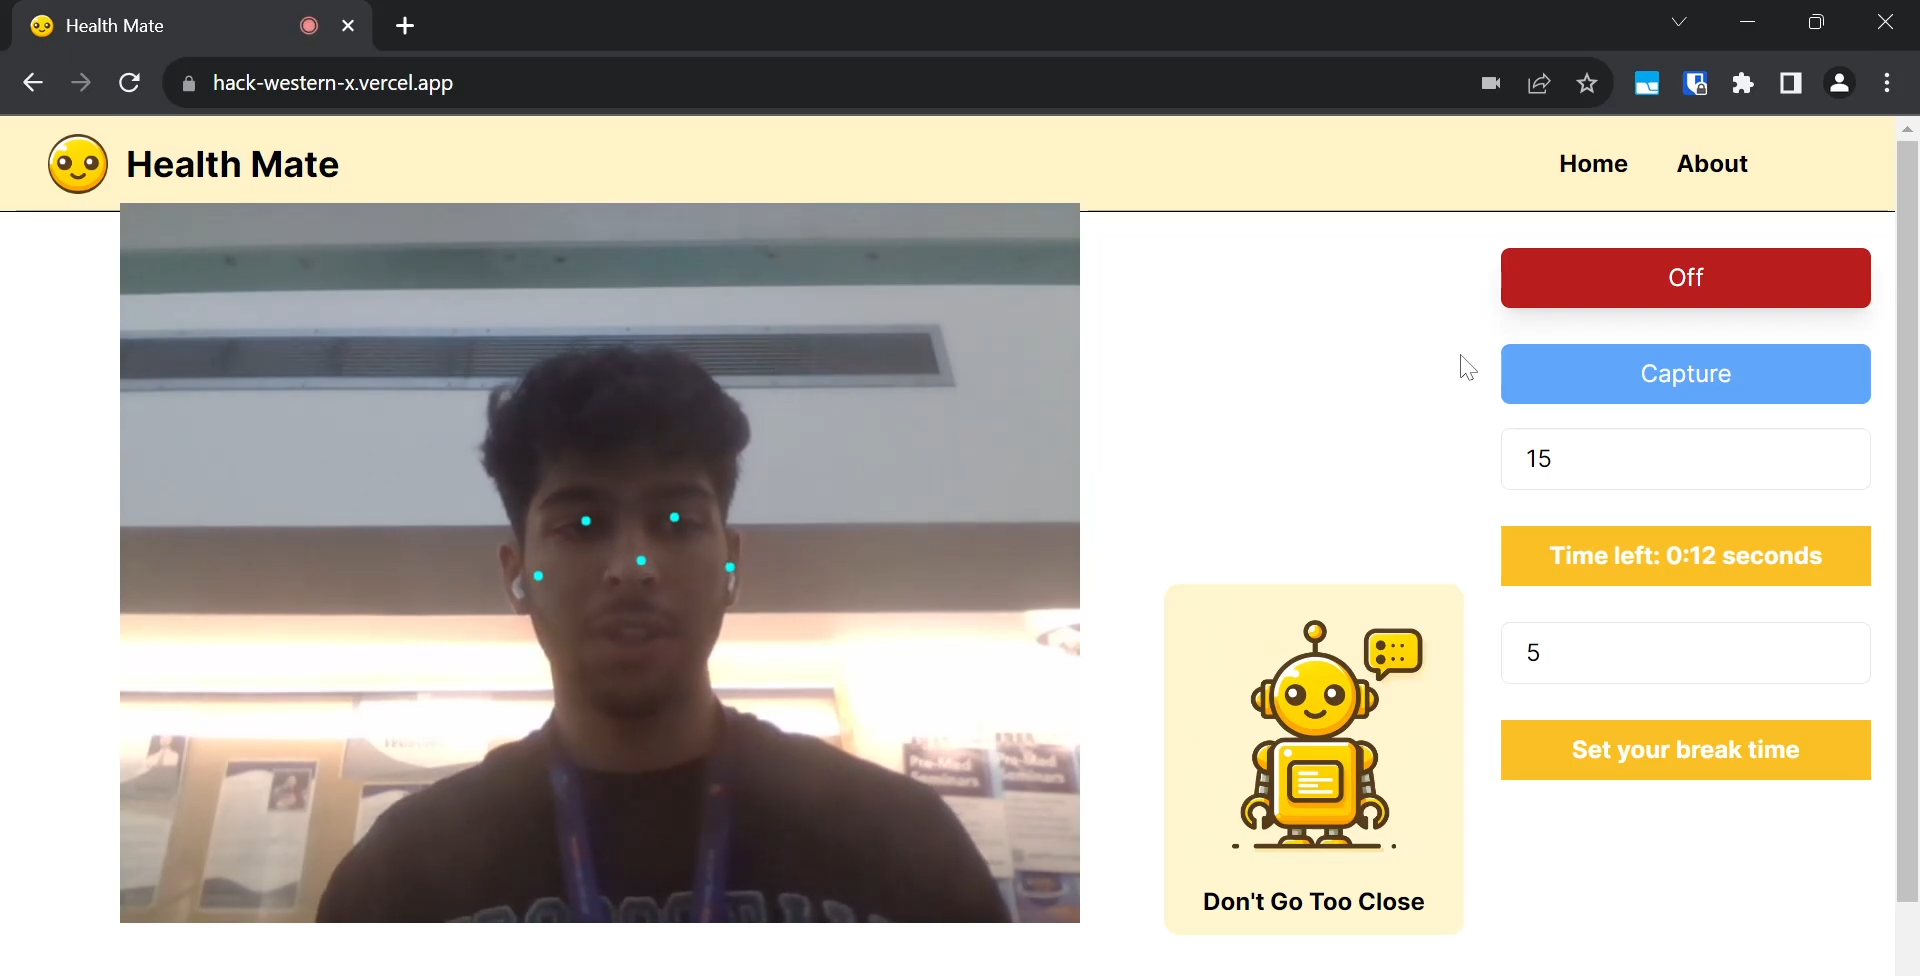
Maintaining Safe Distance from Screen 📏
Health Mate advises you to maintain a safe distance from your screen. Through snapshots for calibration and face detection algorithms, it gauges your proximity to the screen and alerts you if you’re too close, promoting eye safety and healthier viewing distances.
How it’s Built 🛠️
Health Mate is built using cutting-edge technologies such as advanced AI posture detection, face detection algorithms, and innovative screen time management methods. It utilizes Next.JS & React, JavaScript, CSS, and HTML for the front-end and integrates various AI technologies for accurate monitoring and detection.
We used infobip to send the SMS!
Code Breakdown
TensorFlow.js for Pose Estimation
TensorFlow.js enables real-time pose estimation directly in the browser. We utilize the PoseNet model provided by TensorFlow.js to detect key points on the user’s body. These key points are used to analyze posture and determine if the user is sitting up straight or facing the camera.
// Example of loading PoseNet model
const net = await posenet.load();
const pose = await net.estimateSinglePose(video);
This code snippet demonstrates loading the PoseNet model and estimating a single pose from a video feed
Next.js for Routing and Server-Side Logic
Next.js provides built-in support for routing and server-side rendering. We create different routes for our application, such as the main page for interacting with the webcam and an API route for sending SMS messages.
Note we also use server-side because Vercel the platform we deploy to allows it and it would further decrease load on the browser, especially because the model is heavy so this makes the webapp more performant.
// Example of defining routes in Next.js
export default async function handler(req, res) {
  if (req.method === 'POST') {
    // Handle POST request for sending SMS
  } else {
    // Handle other HTTP methods
  }
}
Here, we define an API route in Next.js to handle POST requests for sending SMS messages.
Code Organization and Modularization
We modularize our code into separate files and folders to keep the codebase organized and maintainable. Utility functions for drawing keypoints and skeletons on the canvas are stored in utilities.js.
// Example of importing utility functions
import { drawKeypoints, drawSkeleton } from './utilities';
This import statement demonstrates how we import utility functions from a separate file for use in our main application code.
Importing External Libraries and Components
In terms of importing, we have to make sure the build is light because the model runs in the browser and that is heavy already. For that we used ES6 modules import style because it does “tree-shaking” which means it uses only what is called from the code and used
// Example of importing external libraries and components
import * as posenet from '@tensorflow-models/posenet';
import Webcam from 'react-webcam';
import RobotImage from './components/RobotImage';
Leveraging React Hooks for State Management
We use React hooks such as useState and useEffect to manage state and perform side effects in our application. For instance, we use useState to manage timer states and useEffect to run asynchronous tasks.
Although note that in an environment with a bigger team working on the webapp, we would probably use Redux to simply state mangement.
Considerations for scaling Health-Mate
In terms of deploying this in a production environment, we would have to change several things:
- First, we would need to ensure environment variables are in a
.envfile so no API keys are exposed - We would further prune the AI model and train it on webcam images specifically to decrease its weight and increase its accuracy
- To scale properly with the model on all devices, we would use server-less front-end functions to run the model. This would still be data-privacy focused because its state-less but would decrease load on the browser significantly.
- In terms of modularization, we split the workload into component/feature based folders that would scale in a bigger project
Links
Source Code: https://github.com/HikaruSadashi/HealthMate
📝Hackathon Submission: https://devpost.com/software/wellnesswally